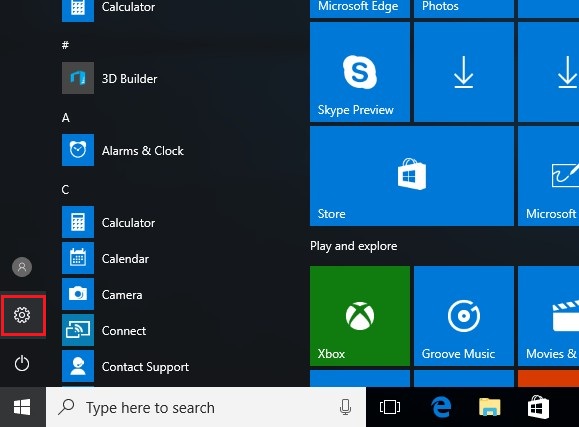
1. Click "Start" button and select "Settings" icon:
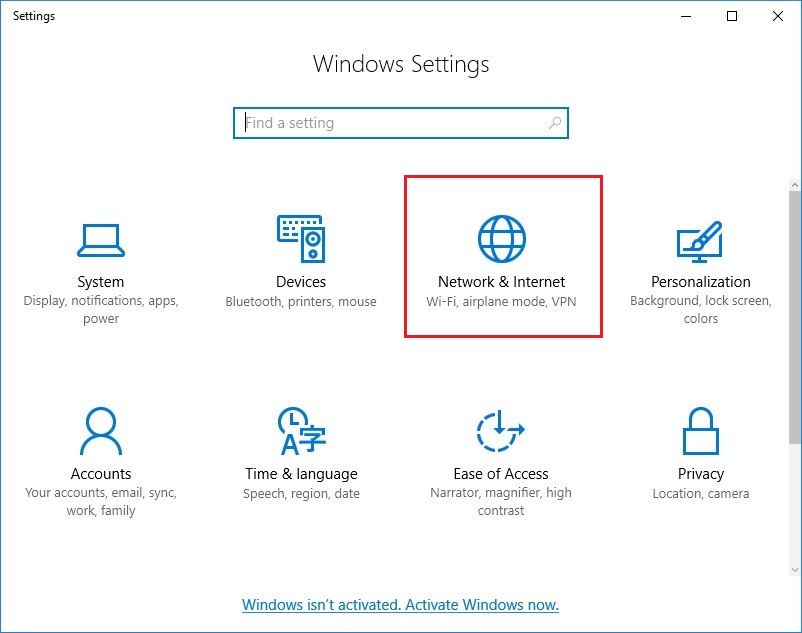
2. Click "Network & Internet":
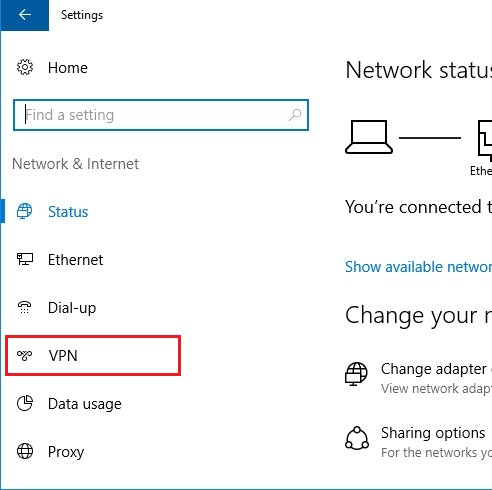
3. Click "VPN":
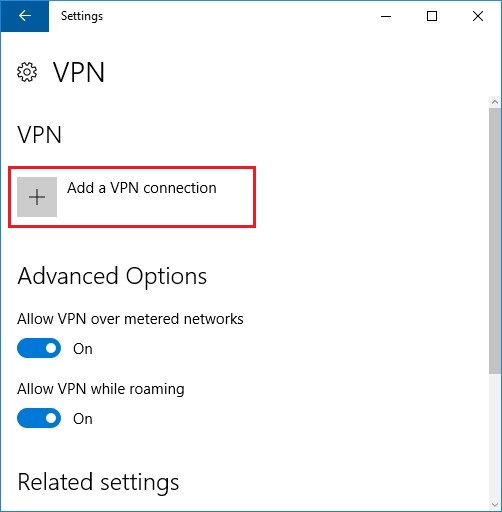
4. Click "Add a VPN connection":
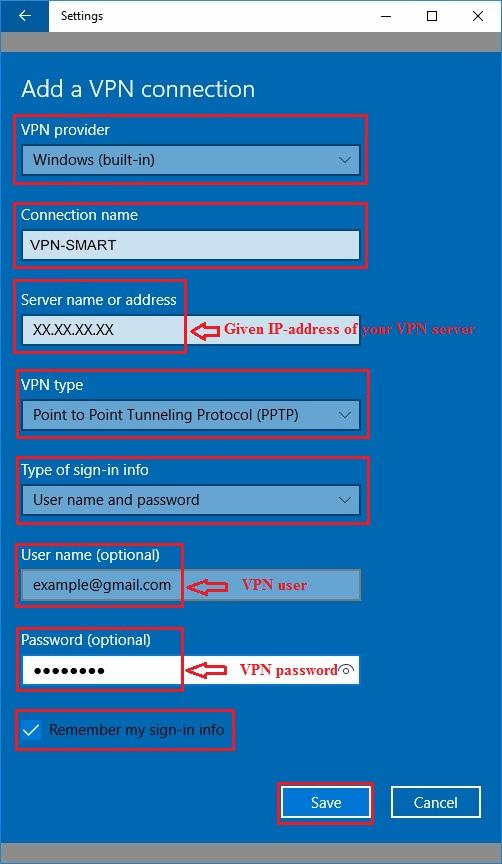
5. On the next page:
* in the list "VPN provider" select "Windows (built-in)"
* in the "Connection name" field, enter the name of the connection, for example, "VPN-SMART"
* in the field "Server name or address" enter given ip-address of your VPN server
* in the list "VPN type" select "Point to Point Tunneling Protocol (PPTP)"
* in the list "Type of sign-in info" select "User name and password"
* in fields "User name (optional)" and "Password (optional)" enter given VPN user name (e-mail) and VPN password
* Check "Remember my sign-in info" checkbox and click "Save" button:
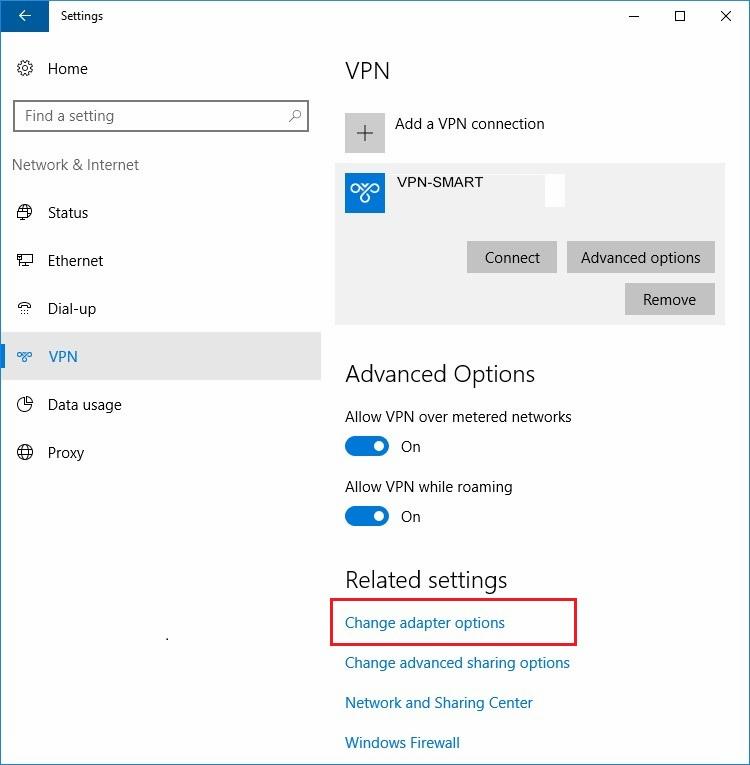
6. At this stage, a newly created connection VPN-SMART is ready, but network adapter is not yet configured. Do not connect now, please click "Change adapter options":
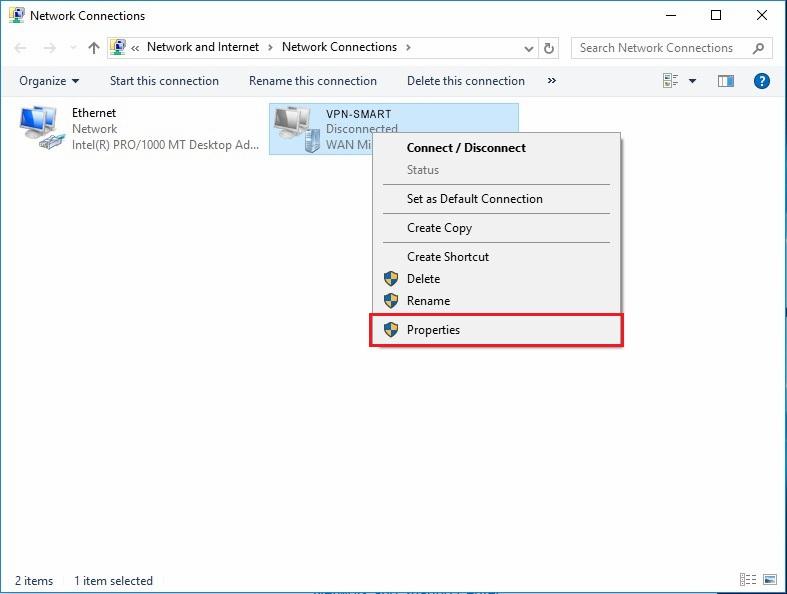
7. In context menu of a newly created connection VPN-SMART click "Properties":
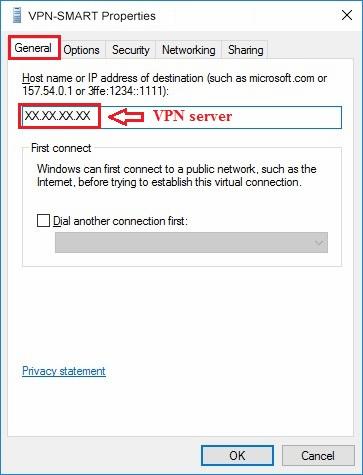
8. Once again check the given ip-address of your VPN Server on "General" tab:
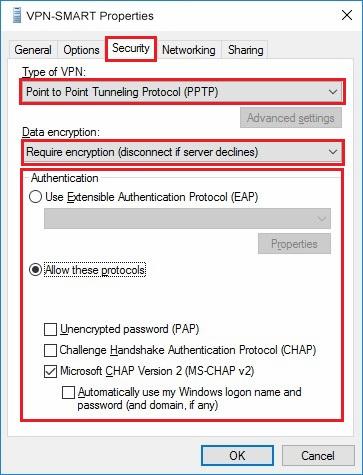
9. Go to "Security" tab. Set Type of VPN as "Point to Point Tunneling Protocol (PPTP)" and Data encryption as "Require encryption (disconnect if server declines)". Then check "Microsoft CHAP version 2 (MS-CHAP v2)" checkbox and click "ОК". Also close the previous "Network Connections" window:
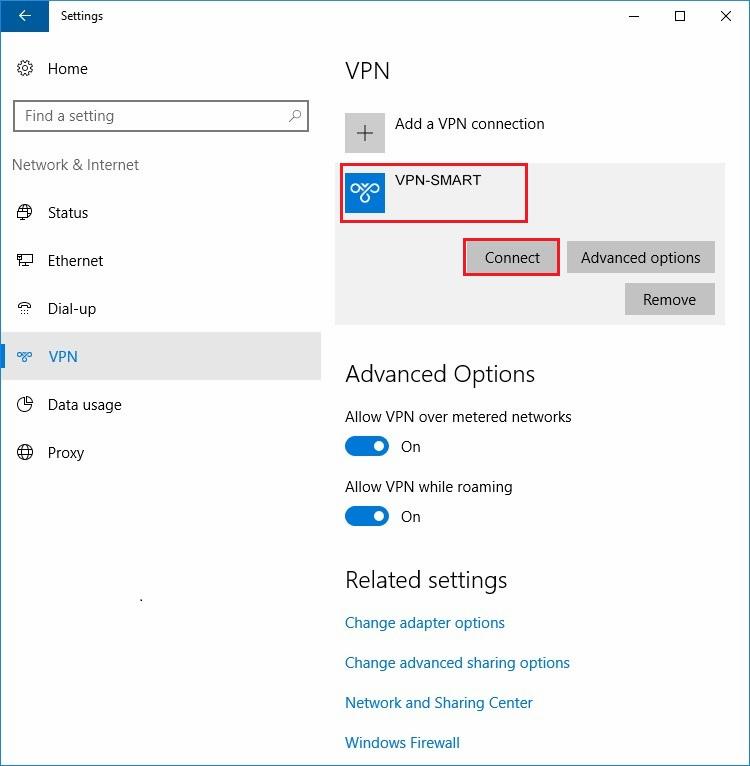
10. Now everything is ready. You can connect to VPN server. To get connected please click "Connect" button in the window "Settings->Network & Internet". If buttons Connect, Advanced Options and Remove are not visible then click "VPN-SMART" to display them:
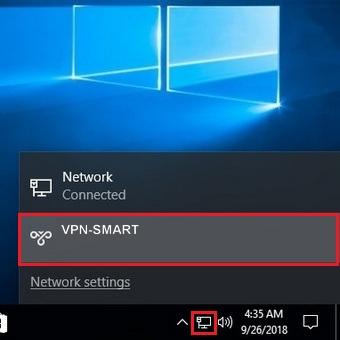
From now, after VPN-connection has already been created, it can be turned on/off from "Network" icon:
