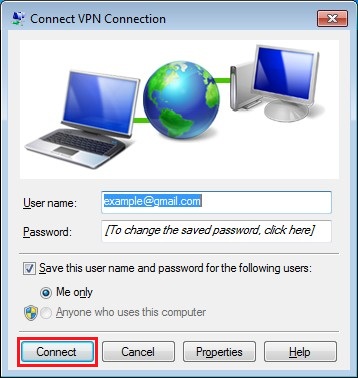
Attention! In order to get L2TP/IPSec working correctly with Windows, it is necessary to make changes to the registry (add a parameter). This problem is listed on the official Microsoft website https://support.microsoft.com/en-us/kb/926179. This procedure will be described below in (1) of this manual. If you are not ready to make changes to the Windows registry, then you can set up VPN with PPTP protocol (see PPTP settings), which not required the modification of the registry.
1. Making changes to the Windows registry (Administrative rights):
1) Run regedit with administrative privileges and locate the section HKEY_LOCAL_MACHINE\SYSTEM\CurrentControlSet\Services\PolicyAgent
2) Create DWORD (32 bit) parameter AssumeUDPEncapsulationContextOnSendRule and set value 2 for it.
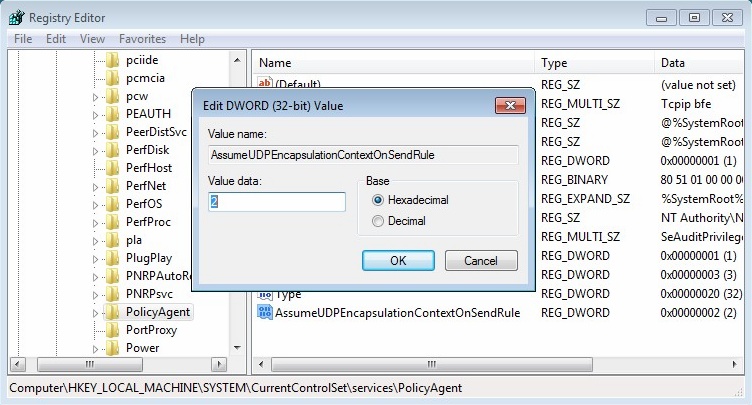
3). Restart Windows!!!
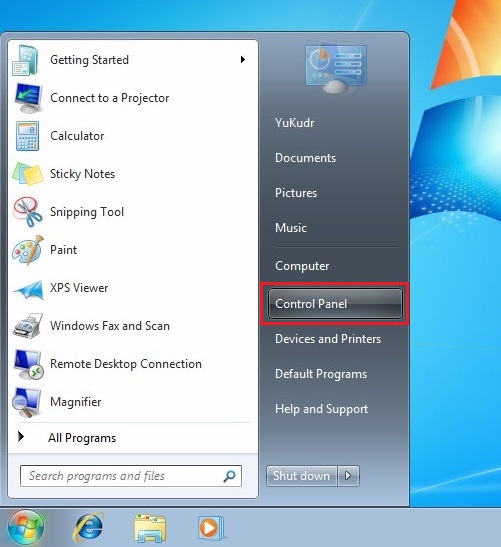
2. After registry has been modified and computer was restarted, we can start to configure L2TP/IPSec connection. Click "Start" button and select "Control Panel":
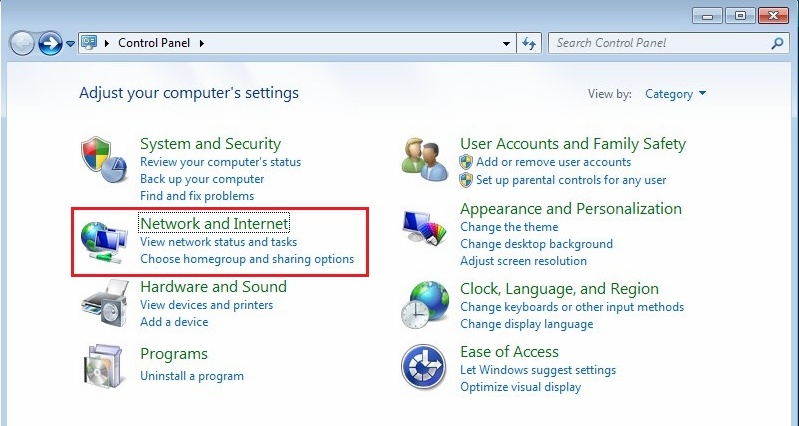
3. Click "Network and Internet":
4. Click "Network and Sharing Center":
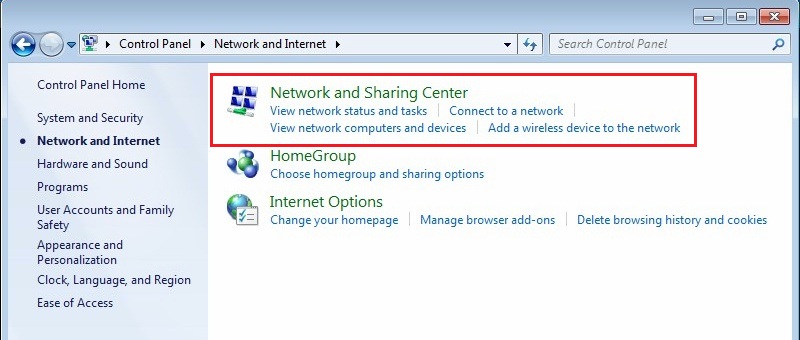
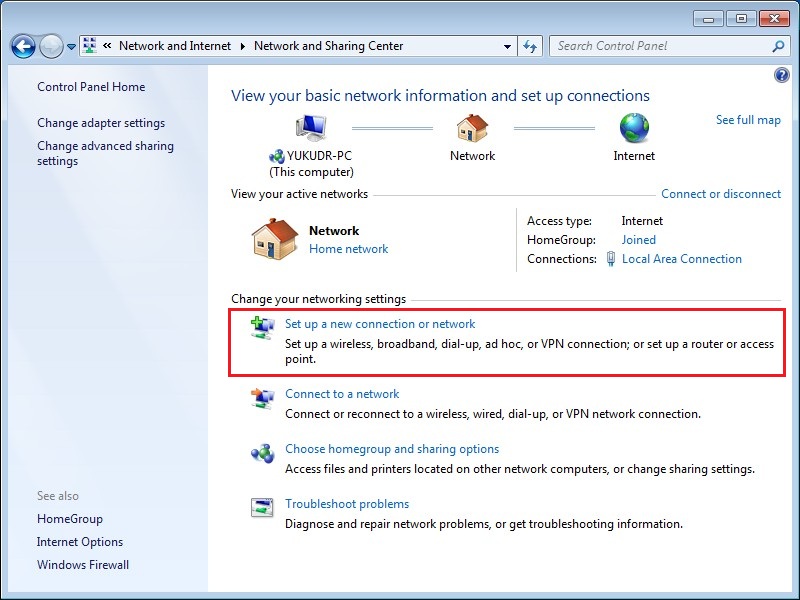
5. Select "Set up a new connection or network":
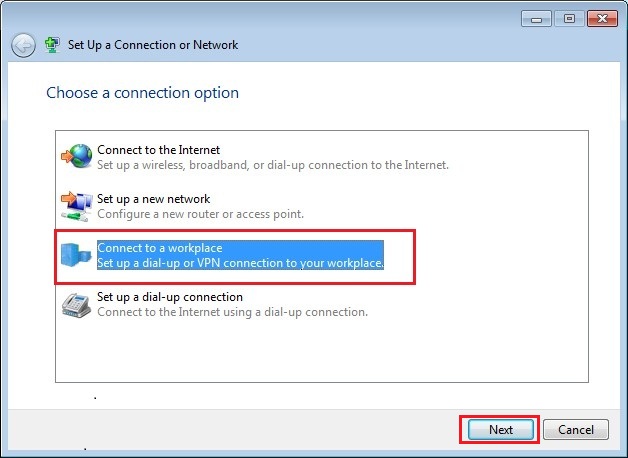
6. Select "Connect to a workplace" then click the button "Next":
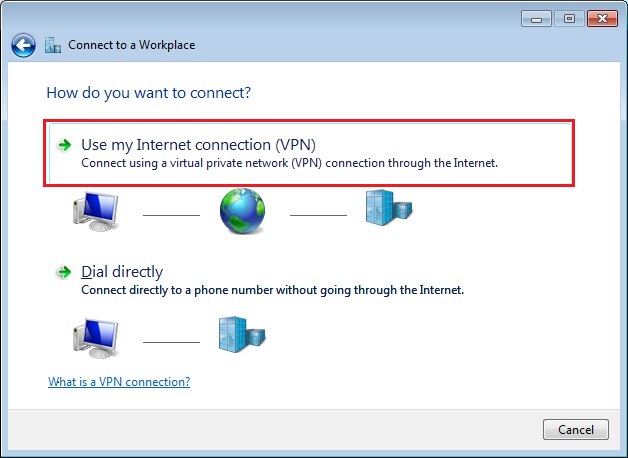
7. Select "Use my Internet connection(VPN)":
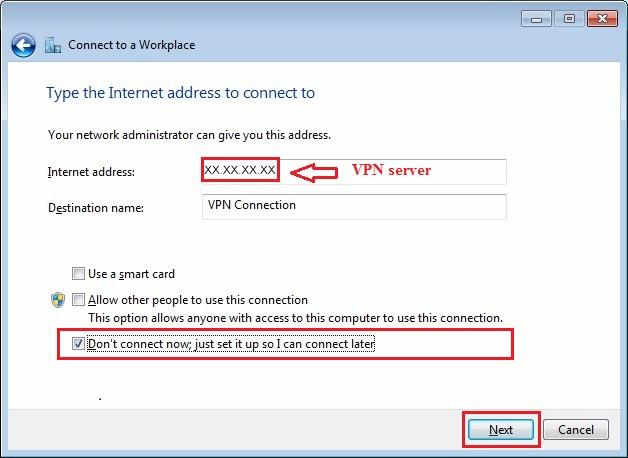
8. In the "Internet address" field enter given IP address of your VPN server. Check "Don't connect now; just set it up so I can connect later" checkbox then click the button "Next":
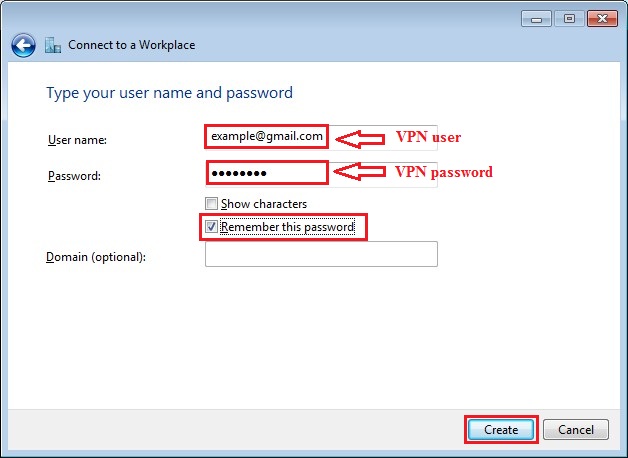
9. Enter given VPN user name and password. Check "Remember this password" checkbox and click the button "Create":
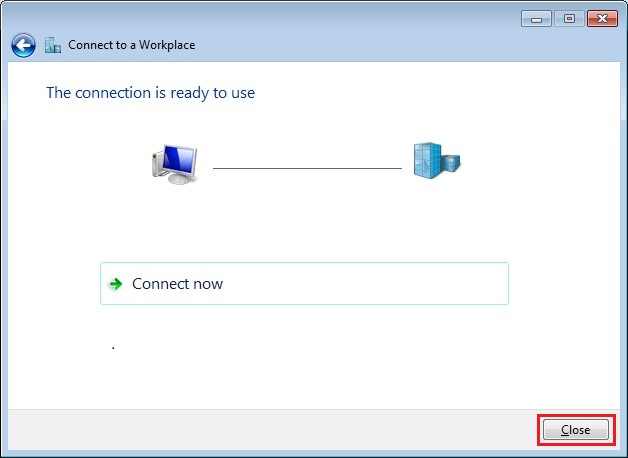
10. At this stage, the connection is ready, but network adapter is not yet configured. Do not connect now, just click the button "Close":
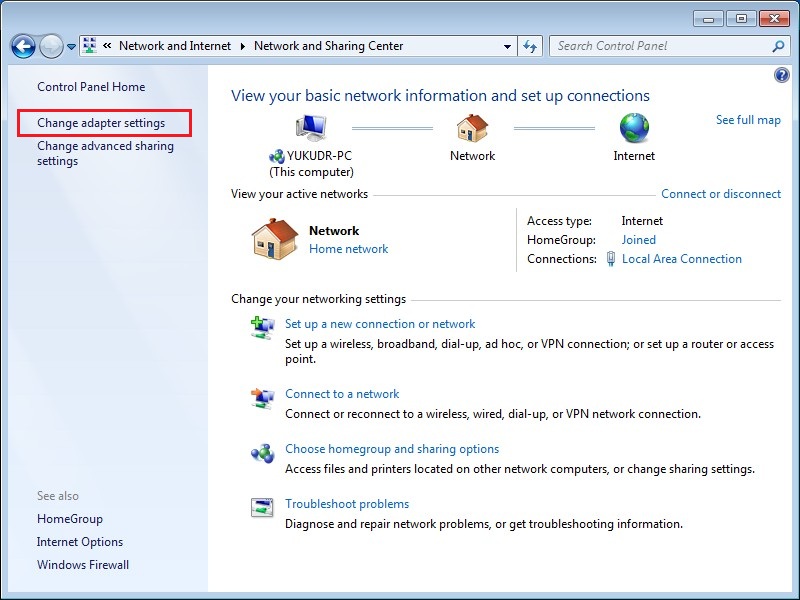
11. In the left panel of "Network and Sharing Center"click "Change adapter settings":
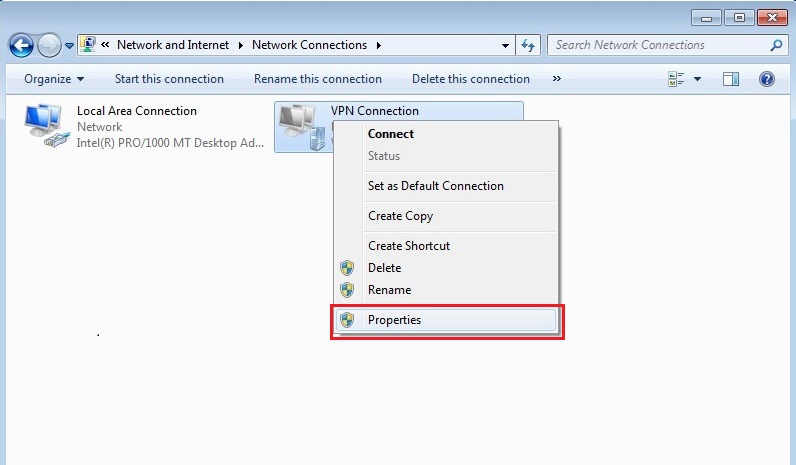
12. In context menu of newly created connection click "Properties":
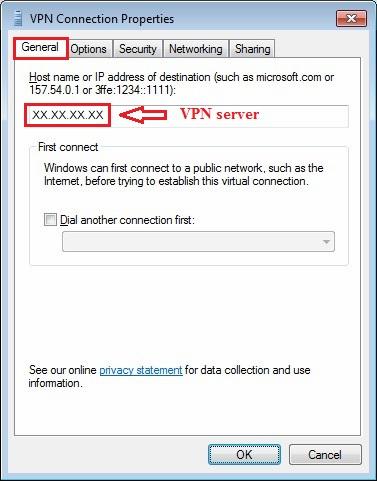
13. Check again the given ip-address of your VPN Server on the "General" tab:
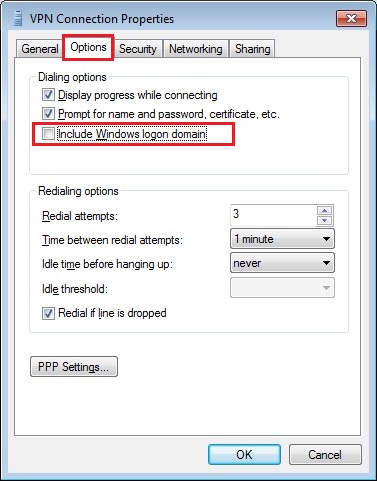
14. Go to "Options" tab and uncheck "Include Windows logon domain":
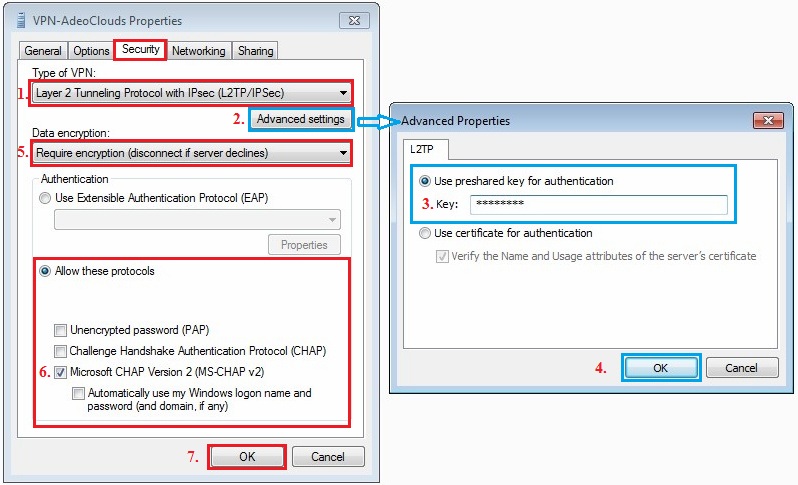
15. Go to "Security" tab:
1) Set "Type of VPN" as "Layer 2 Tunneling Protocol with IPSec (L2TP/IPSec)".
2) Click the button "Advanced settings".
3) In the new window "Advanced Properties" enter given IPSec pre-shared key to the field "Key".
4) Close "Advanced Properties" window by clicking "OK".
5) Set "Data encryption" as "Require encryption (disconnect if server declines)".
6) Set "Microsoft CHAP Version 2 (MS-CHAP v2)" protocol.
7) Click the button "ОК".
16. In the context menu of a newly created connection click "Create Shortcut":
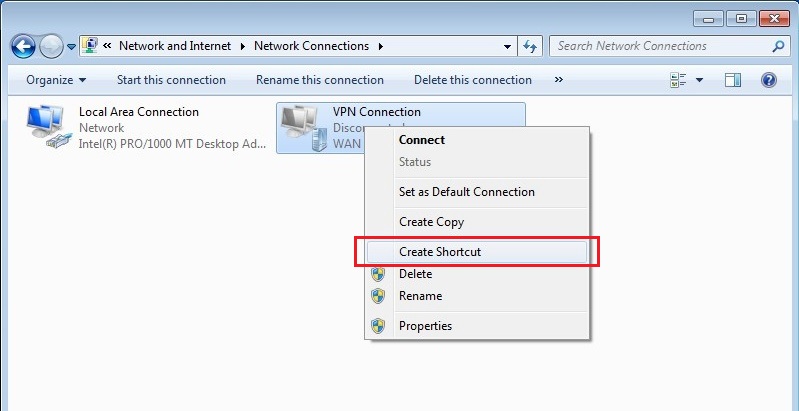
17. If message "Windows can't create a shortcut here..." is displayed then click "Yes":

18. The new shortcut will be created on your desktop. Double-click on it.

19. In the opened window click "Connect" to get connected:
